
Learn How to Build Web Apps from Scratch: Say Goodbye to Installations!
Creating a web app is a challenging journey that involves various tasks. However, fear not. Discover how to build a successful web application and increase ROI software right in this article.

Content Map
More chaptersBuilding web applications from scratch is an interesting process that requires both inspiration and design, as well as essential practical experience and profound analysis. Web apps are indispensable in the modern world as they are the foundation for most internet services, starting with social networks and ending with online stores. It might amuse you that the first web application was created by Tim Berners-Lee in 1990, and he came up with the invention of the World Wide Web. This laid the basis for much more fascinating and engaging web experiences of today.
Web app development entails planning, designing, coding, testing, and deployment. Notably, today, the web app development process is supported by different methodologies, including no-code app builders and low-code platforms, which enable people without coding experience to develop web apps. Besides, the average longevity of a website is estimated to be barely three years, which is a strong argument why their constant russification, update, and maintenance should be carried out to ensure that the web applications remain relevant and secure.
How to build web apps that work? Below you will find the detailed step-by-step web application development process guide, which will equip you with the information and practical resources for leveraging your idea into a full-fledged virtual reality.
Key Takeaways:
- Building web apps from scratch entails a number of steps, such as structural development, front-end development, back-end development, database integration, and deployment.
- Some of the most common components are HTML and CSS for the front end, server-side languages such as Python and frameworks like Django for the back end, and databases such as MySQL and MongoDB for data.
- After the web app is developed, it has to be hosted on a reliable cloud hosting provider and requires some basic configurations to be made.
What Is a Web App?
A web application, or web app, refers to an interactive computer program that runs on the web server and is controlled using the browser. Web applications are an evolution from standard desktop applications in that you do not have to download any applications to the user’s computer. They employ HTML, CSS, JavaScript, etc., web technologies to make them friendly to the users and provide the mechanism of interactivity. There are several examples of web applications that people actively use today, including Gmail, Google Docs, Trello, and Slack. These applications facilitate users in executing various tasks consisting of email handling, document handling, and project-oriented working, in addition to live interactions.
Web App Benefits Compared to Mobile Apps
When organizations want to improve the approachability and extend the outreach of their business, it is decisive to determine whether to build the web or a mobile application. Although, each has its advantages, there are some benefits which are unique to web apps and which may ultimately make the option preferable in some circumstances.
Accessibility and Cross-Platform Compatibility

Indeed, one of the strongest features of web apps is the capability to be run on various device and operating systems. Web apps are launched via the web browser and they can be used on any device ranging from the PC, tablets or mobile phones without download or installation. Such compatibility guarantees a greater number of users since people do not have to dwell exclusively on one type of device or operating system.
Furthermore, because web apps are built using standard web technologies such as HTML, CSS, and JavaScript, they can easily adapt to various screen sizes and resolutions. This responsiveness is essential in today’s diverse digital landscape, where users expect a seamless experience regardless of the device they are using.
Lower Development and Maintenance Costs
Creating a web application is generally cheaper compared to developing a mobile application. It is mainly due to the fact that there is no requirement to develop more than one version of the app that is compatible with all the devices, starting from iOS to Android and all the other platforms. Besides, this approach saves money when addressing initial investments, sustaining multiple codebases, and constant update costs.
Web applications can be easily updated and without interference. If a modification is made to the web app, users can access the latest version simply by refreshing their browser. This is rather different from mobile apps, which require users to download updates manually from app stores. This is found to enhance resource use because making alterations to the software and fixing issues are less intricate, thereby allowing businesses to optimize efforts to refine characteristics and champion usability.
Enhanced SEO Opportunities
Another critical aspect of web apps is that they are capable of contributing to the increase of visibility, with search engine indexing usually adding a boost to organic traffic. In contrast to the typically isolated environment of mobile apps that are discovered primarily through app stores, web apps can be given an SEO promotion to attract their users. It will thus be easier for potential users to notice a business’s offerings through the content, metadata, and keywords.
This increases the visibility of the search engine not only for the purpose of attracting new users but also for the additional credibility that the brand receives. A well-ranked web app adds value and authority to the brand, hence increasing the chances of customers being given a choice to go for the brand. When businesses integrate good SEO strategies with a strong web application, they can generate traffic and maintain users.
Key Components of a Web App
The construction of the web apps is based on several components that are linked together to make the required interaction possible. The primary components include:
- Client-Side (Front-End): This is the part of the web app that users interact with directly. It includes the user interface (UI) and is built using web technologies like HTML, CSS, and JavaScript. The front end is responsible for rendering the visual elements of the web app and handling user interactions.
- Server-Side (Back-end): This part processes user inputs, calculates, and handles the application’s functionality. It usually requires a server-side programming language, for instance, Python, Ruby, PHP, or Java, and a framework, for instance, Django, Ruby on Rails, or Laravel.
- Database: Data storage and management systems or databases exist to cater to data used by the web app. Major databases include MySQL, PostgreSQL, and MongoDB. The database layer ensures data integrity and supports CRUD (Create, Read, Update, Delete) operations.
- Application Network: This component defines how the client side interacts with the server side and more often uses APIs to exchange data. It makes sure that users’ requests are well handled and the system produces well-timed responses.
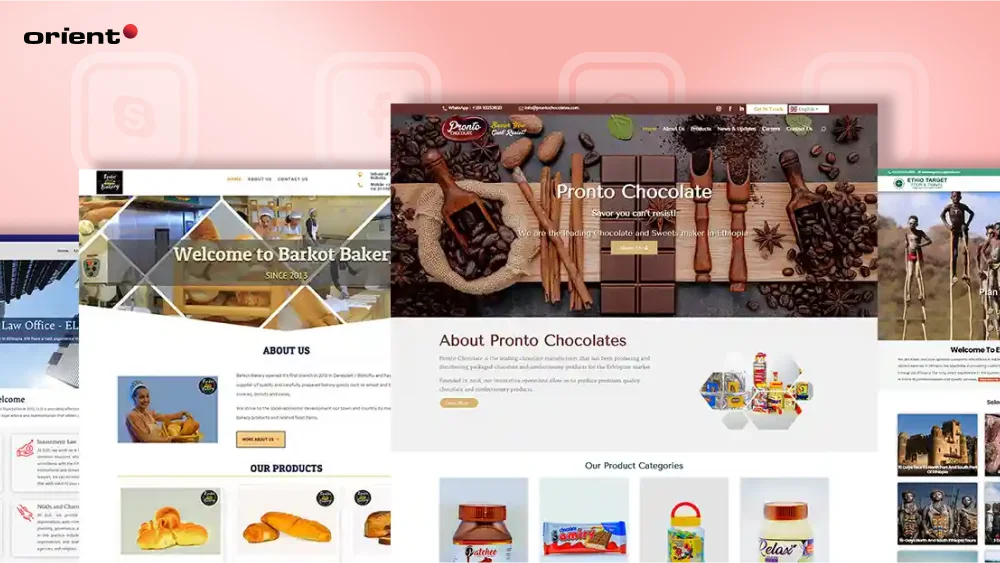
By understanding these components and technologies, you can effectively bring your web app idea to life, creating a functional and engaging application that meets the needs of your users. Whether you’re developing web browsers or mobile apps, mastering these elements is key to successful web app development.
How to Create a Web Application on Your Own
Creating web apps involves several key steps; below is a detailed guide to help you navigate the process.
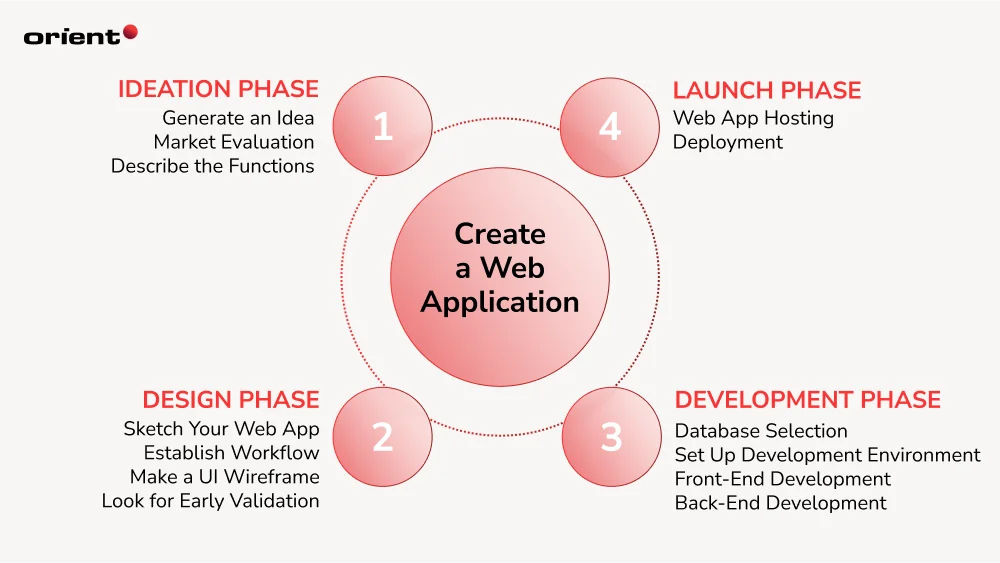
1. Ideation Phase
Generate an Idea
As with any web app development, it is essential to start with an idea, and what better idea than a good one that solves a particular need or issue? The first of these is innovative and involves paying attention to the happenings in the society at large. Identify highly relevant and timely issues, inadequate solutions or services, or break-through-emerging opportunities. It is helpful to talk with potential users and discuss with them about their problem and needs through online questionnaire, interviews and focus groups.
Moreover, using brainstorming in your team can create conditions for the free exchange of ideas in a group. Mind mapping or free writing styles may be used to create a bouquet of ideas. Do not be afraid to push boundaries; you will be surprised by how effective some of the most creative solutions happen to be. It is, therefore, necessary to focus on a problem that will be appealing to a target audience since it will generally form the basis of the web app.
Market Evaluation
After you have made up your mind and chose your tentative idea, the next important process is to carry out market research. Start with your competitors in the industry as well as formulate with companies that provide comparable products. Competitive analysis and targeting of your audience in the process brings validation to your concept. Understand their advantages and disadvantage, users feedbacks, and market exposure. This analysis will not only allow you to identify the successful factors but will also find the areas that can be effectively differentiated.
If you couldn’t identify a similar product, then maybe you landed on the invention of a lifetime through an innovative thought. On the other hand, it is quite likely that someone else has attempted the same strategy and met with failure. Web apps can be a success, too, but in order not to make the same mistakes over and over, it is necessary to carefully study the market. The main strength of penetrating deep into the market is that you are able to get more insights and knowledge from other competitors, industries, and target customers. Using the data in this research, you will be able to spot potential issues, modify the features of your offerings, and position your app for success.
Describe the Functions
When the idea and the market have been identified, it’s time for outlining the main purpose of the product. Do not fall into the trap of trying to build a feature-rich, single application. Concentrate on the features most relevant to your target audience because that will help you deliver on your objectives.
Keep in mind that the web app is a product that changes over time with the goal of meeting the needs of users. The first step is to start building an application with the best basic elements and improve it as per the feedback of the users and the continuously changing market. Distinguish between the features that would be most valuable to customers and stakeholders, and don’t hesitate to delay less essential features in new versions of a product. By keeping your attention on the goal and by rejoicing in small achievements, you will have positive experiences in the process and design a successful web app.
2. Design Phase
Sketch Your Web App
The design process begins with sketching your web app, which serves as a preliminary visual representation of your concept. This step involves creating rough drawings or diagrams that depict the layout and structure of your app’s pages. The goal is to visualize how different elements will fit together and how users will navigate through the application.
During this phase, focus on the key components of each screen, including buttons, menus, and content areas. Use simple tools like pen and paper, whiteboards, or digital sketching applications to create these sketches. This is not about perfection; rather, it’s about brainstorming and exploring different ideas quickly. Encourage feedback from team members or potential users on your sketches to refine your vision further. This collaborative approach can spark new ideas and help identify potential issues early in the design process.
Establish Workflow
After sketching, it is time to think about how you are going to work your way through the design problem. This entails figuring out how a typical user will engage a feature of the web app, as well as how they are going to move from one page to another. The most important aspect of a user interface is known as the ‘‘user flow’ or ‘‘user journey’’ and refers to the paths that the user takes through an application; mapping out these paths can reveal problematic or confusing transitions between steps.
To create an effective workflow, consider using flowcharts or user journey maps to illustrate the steps users will take to complete tasks within the app. Identify key actions, decision points, and possible user pathways. This planning stage should also consider different user personas and their specific needs, ensuring that the workflow accommodates various user scenarios. A clear workflow helps streamline the design process and aligns the development team with the intended user experience.
Make a UI Wireframe
Wireframes are detailed blueprints that outline the layout and design of each page in your web app, focusing on structure and functionality rather than visual aesthetics. This step is critical for translating your sketches and workflow into a more formal design framework.
Using wireframing tools like Figma, Sketch, or Adobe XD, create wireframes that highlight key UI elements such as navigation menus, buttons, input fields, and content areas. Pay attention to the arrangement and spacing of these elements to ensure a logical and intuitive design. Wireframes should also incorporate annotations that explain how each feature will function, providing context for developers and designers alike.
Look for Early Validation
You now have an impressive wireframe that visually represents your web app. It’s time to share your creation with potential users and gather constructive feedback. Simply asking friends if they would use your app isn’t sufficient; instead, seek out a small group of representative users from your target market. Engage with them in their preferred communities, whether that’s online forums, social media groups, or in-person settings, to validate the problem your app addresses. Present your solution to these individuals and strive to build a relationship with them, as they could become your future customers.
As you gather feedback, make sure to take detailed notes and document all insights. This information will be invaluable as you direct the development of your Minimal Excellent Product (MEP). The feedback you receive should guide your prioritization of features and improvements, ensuring that your web app aligns closely with user needs and expectations. Once you’ve processed this feedback and validated your product concept, you’ll be ready to move forward with building your web app.
3. Development Phase
Database Selection
The first consideration is the choice of the right database management system (DBMS) for your web application. The two main types of databases are SQL (relational) and NoSQL (non-relational). There are various types of SQL databases, for example, MySQL, GitHub PostgreSQL, and SQLite, which are best for structured data and queries. MongoDB, Cassandra, and Firebase are NoSQL databases and suitable for unstructured data and scalability. Your decision will be a matter of preference depending on your data input and output, query complexity, and the scalability of the server.
Once you have made that decision, it is time to connect your web app to the database. One of the most common methods is to configure a connection from your server to the database by a connection string that specifies the type of your database, host, port, and credentials. Many of the web frameworks available at the moment are equipped with the means to access a database. For example, in Node.js, libraries such as Sequelize for SQL-based systems and Mongoose for MongoDB can be used.
Once you have a connection, you have to come up with a schema for your database. A database schema is the structure of the database; it contains details of tables, fields, and how they are related. There are certain principles that need to be followed when planning the schema for a database to ensure the integrity of the data and the efficiency of the database system.
Set Up Your Development Environment
Before jumping to create a web application, it’s vital to establish the environment and decide the tools that should be used, as well as designing the project’s structure.
Choosing an appropriate code editor or an Integrated Development Environment (IDE) is critical for efficiency. Some popular options are Visual Studio Code, Sublime Text and Atom. For more extensive functionality, there are lead IDEs such as WebStorm or Visual Studio with in-built debuggers and testing tools simplifying the development process.
Depending on the setup of your technology stack, you may have to install various tools and libraries. For instance, if you focused on Node.js to develop the back-end, then you will have to install Node.js and npm (Node Package Manager). If you are using front-end frameworks like React and Angular, you will need to install their libraries. Furthermore, you may have to manage dependencies effectively using a package manager tool like Yarn or npm.
Front-End Development
After your development environment is set up, you can move to front-end development, which is the process of designing the layer that the users interface with.
Begin with creating the skeletons of your web page with HTML. This involves using elements like headers, paragraphs, and divs to organize content semantically. HTML5 features include using other enhanced tags such as <header>, <footer>, <article>, <aside>, and <section> to make a web page more accessible and easier to optimize by search engines.
Once your web page is constructed, the next process is to design or style your web page using CSS. Most of CSS is used in defining colors, layout, fonts and other appearances of web pages. Bootstrap and Tailwind CSS are examples of CSS frameworks that can be used to develop components and other features that have responsive designs and make the creation of decent looking and mobile first web design easier.
To build a web app that is engaging, use JavaScript in order to make it interactive. This can be done directly using plain JS or jQuery and other libraries (to address parts and full DOM (Document Object Model) changes and respond to events like click or form submission). In addition, the current front-end frameworks are React, Angular, and Vue. JS can be used to develop enhanced single-page applications (SPAs) that load more content without causing page reload.
Back-End Development
When the front-end is done, you will have to create the back-end, which deals with the working of the application, how the data is managed, and how it sends and receives data from a server.
Select what back-end technology can be suitable for the chosen application. Some familiar choices are Node.js, Python with Flask, Ruby on Rails or PHP, and Laravel. Configure your server to be ready to respond to any request. For Node.js, this might require using Express.js to set up a basic server whose ability is to process HTTP requests.
Another critical process of the back-end development is setting up the API endpoints. These endpoints make it easy for the front end to send information to the back end and vice versa. For example, you can include an endpoint for user login, data acquisition, or form submission, among others. Make sure your endpoints adhere to the RESTful paradigm of the organization so that those conventions, such as GET, POST, PUT, and DELETE, should be easily identifiable.
4. Launch Phase
Launching your web app involves making it accessible to users over the internet.
Web App Hosting
Selecting a cloud hosting provider is a very important decision when deploying a web app since it determines its efficiency and reliability. The most common providers are AWS, Google Cloud Platform, Microsoft Azure, and Heroku. These platforms have different services and options for pricing, so consider how their possibilities can be useful for your company, how simple they are, and what kind of support they provide. For static websites, simple platforms such as Netlify and Vercel that are optimal because they support version control systems.
Deployment
The deployment process involves moving your web app from your developer environment to the hosting server. This usually involves compilation of your application scripts, other resources, as well as dependencies, and then hosting on the server. A lot of hosts offer deployment tools that work in conjunction with version-control systems such as Git, for example, GitHub. For instance, you can use GitHub Actions to automatically deploy whenever you make new changes to the repository.
After deploying your web app, you need to configure various settings to ensure it runs smoothly. This includes setting up environment variables, configuring your domain name, and securing your app with SSL/TLS certificates. Additionally, you should set up monitoring and error-tracking tools to keep an eye on your app’s performance and quickly address any issues that arise. Tools like New Relic, Sentry, and Google Analytics can provide valuable insights into your app’s usage and performance.
Additional Suggestions
These few steps mentioned above can help you to plan and build and deploy your web application solution to production with high availability and scalable accessibility for maximum users. Regardless of the coding process being followed or whether you are creating your web application from scratch using a no-code app builder, it helps to have insights into these processes.
For professional help, consider working with Orient Software. We have professional web application developers who are willing to assist you in creating the best custom web application within your brief. With great experience and a professional approach, Orient Software is all you need to bring your web app idea to life while delivering the best in terms of functionality and usability.

